In the quest for a healthier lifestyle, you’ve likely heard the buzz about gut health. And central to a thriving gut microbiome are fermented foods, particularly fermented vegetables.
More than just a culinary trend, lacto-fermentation is an ancient preservation method that transforms everyday vegetables into probiotic powerhouses.
Imagine crisp, tangy pickles, zesty sauerkraut, or vibrant kimchi, all teeming with beneficial bacteria that support your digestion, boost your immune system, and even influence your mood.
Mastering fermented vegetables at home is not only incredibly rewarding but also surprisingly simple. This comprehensive guide will demystify the process, empowering you to create your own delicious, gut-friendly ferments.
The Gut-Health Connection: Why Fermented Vegetables?
Our gut is home to trillions of microorganisms – a complex ecosystem known as the gut microbiome. A diverse and balanced microbiome is crucial for overall health, influencing everything from nutrient absorption to immune function and even mental well-being.
Fermented vegetables, specifically those made through lacto-fermentation, are rich in probiotics – live beneficial bacteria that actively contribute to this microbial balance.
During fermentation, lactic acid bacteria (LAB), naturally present on vegetables, consume carbohydrates and produce lactic acid. This acid acts as a natural preservative, inhibiting harmful bacteria while allowing beneficial strains to flourish.
The benefits of incorporating these living foods into your diet include:
- Improved Digestion: Probiotics help break down food and enhance nutrient absorption.
- Enhanced Immunity: A significant portion of your immune system resides in your gut.
- Reduced Inflammation: Bioactive compounds in fermented foods can help soothe gut inflammation.
- Nutrient Boost: Fermentation can increase the bioavailability of certain vitamins (like B vitamins) and minerals.
- Potential Mood Regulation: The gut-brain axis suggests a link between a healthy gut and better mental health.
Understanding Lacto-Fermentation: The Basics
Lacto-fermentation is an anaerobic process, meaning it occurs without oxygen. Here’s the simple science:
- Preparation: Vegetables are cleaned and often cut.
- Salting: Salt is added to the vegetables, either directly (dry salting) or dissolved in water (brine). Salt helps draw water out of vegetables, creates an environment where beneficial LAB can thrive, and inhibits spoilage organisms.
- Submergence: Vegetables are kept fully submerged under a salty brine. This is critical to create the anaerobic environment.
- Fermentation: Over days or weeks, LAB consume the sugars in the vegetables, producing lactic acid, carbon dioxide, and other flavorful compounds. The acidity preserves the vegetables.
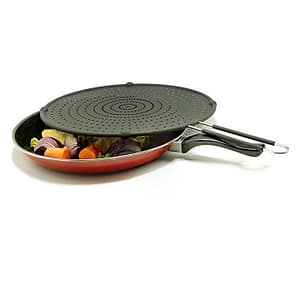
Essential Tools for Your Fermentation Journey
You don’t need a lot of fancy equipment to start! Simplicity is key.
- Glass Jars: Wide-mouth mason jars (quart or half-gallon size) are ideal. They are easy to clean, allow you to observe the fermentation, and are readily available.
- Non-Iodized Salt: Crucial! Use sea salt, pickling salt, or Himalayan pink salt. Avoid iodized salt or salt with anti-caking agents, as these can inhibit fermentation.
- Filtered Water: Chlorine in tap water can interfere with beneficial bacteria. Use filtered, distilled, or boiled-and-cooled tap water.
- Kitchen Scale (Optional but Recommended): For precise salt ratios, especially for brine.
- Fermentation Weights: To keep vegetables submerged under the brine. You can use specialized glass weights or improvise with a small, clean, sterile glass jar filled with water or a large cabbage leaf.
- Airlock Lids (Optional): These allow CO2 to escape without letting oxygen in, reducing the need for “burping” and minimizing contamination risk. You can find kits that adapt to mason jars.
Your Step-by-Step Guide to Fermented Vegetables
Let’s make a simple Sauerkraut or Fermented Carrots – perfect for beginners!
General Ratio: Aim for a 2% salt concentration. This means 20g of salt per 1000g (1kg) of vegetables if dry salting, or 20g of salt per 1000ml (1 liter) of water for a brine.
Method 1: Dry Salting (Best for Cabbage/Sauerkraut)
- Prepare Vegetables: For sauerkraut, remove outer leaves from a head of cabbage. Quarter and remove the core. Finely shred the cabbage (a mandoline or food processor can help, but a good chef’s knife and large cutting board from KitchenWhizdom can make this easier!). For other veggies, chop or slice as desired.
- Salt & Massage: Weigh your shredded cabbage. For every 1000g of cabbage, sprinkle 20g of non-iodized salt over it in a large bowl. Using clean hands, vigorously massage and squeeze the cabbage for 5-10 minutes. The salt will draw out water, creating a natural brine. You’ll see a significant amount of liquid accumulate.
- Pack the Jar: Tightly pack the massaged cabbage and its accumulated brine into a clean glass jar. Use a wooden tamper or your fist to press down firmly, eliminating air pockets and ensuring the cabbage is submerged under its own liquid.
- Weigh it Down: Place a fermentation weight directly on top of the cabbage to keep it fully submerged. There should be at least an inch or two of headspace between the brine surface and the rim of the jar, as bubbling will occur.
- Cover: Loosely cap the jar with a lid (don’t seal tightly to allow gas to escape), or use an airlock lid. Place the jar on a plate or in a shallow dish to catch any overflow during active fermentation.
- Ferment: Store the jar at cool room temperature (ideally 65-75°F / 18-24°C) away from direct sunlight. Fermentation typically takes 1-3 weeks. Warmer temperatures speed up fermentation, cooler temperatures slow it down.
- Monitor & Taste: “Burp” the jar daily if not using an airlock (just briefly open the lid to release built-up CO2). After about 5-7 days, you can start tasting. It should smell pleasantly sour and tangy, not putrid. When it reaches your desired flavor and tanginess, it’s ready!
Method 2: Brine Method (Best for Carrots, Green Beans, Cucumbers)
- Prepare Vegetables: Wash and chop vegetables (e.g., carrot sticks, whole green beans, cucumber spears). Pack them tightly into a clean glass jar, leaving at least 1-2 inches of headspace. You can add aromatics like garlic cloves, dill sprigs, or peppercorns.
- Make Brine: For a 2% brine, dissolve 20g of non-iodized salt in 1000ml (1 liter) of filtered water. Stir until the salt is completely dissolved.
- Pour & Submerge: Pour the brine over the vegetables in the jar, ensuring they are completely submerged.
- Weigh it Down: Use a fermentation weight to keep all vegetables under the brine.
- Cover & Ferment: Follow steps 5-7 from the Dry Salting Method.
How Do You Know It’s Working? Signs of Successful Fermentation
- Bubbles: You’ll see visible bubbles forming in the jar, especially around the vegetables, indicating CO2 production.
- Cloudy Brine: The liquid will become cloudy, which is a good sign of microbial activity.
- Pleasant Aroma: It should smell pleasantly sour, tangy, or yeasty. A strong, putrid smell means something went wrong (discard and restart).
- Flavor Change: The vegetables will become tangier and softer, yet retain a pleasant crunch.
Troubleshooting Common Fermentation Issues
Don’t be discouraged if you encounter a few bumps. It’s part of the learning process!
- Mold (Fuzzy, Colored Spots – green, black, pink): This is a sign of contamination, usually due to exposure to air. Unfortunately, if you see mold, discard the entire batch and start over. Always ensure vegetables are fully submerged.
- Kahm Yeast (White, Powdery Film on Surface): This is a harmless yeast, often mistaken for mold. It’s usually a sign of too much oxygen exposure but is not dangerous. You can skim it off.
- Slimy Brine: Sometimes a harmless bacterial overgrowth can cause sliminess. If the smell is still good, it’s usually fine, but if it’s accompanied by a bad smell, discard.
- Vegetables too Soft/Mushy: Often caused by too high a fermentation temperature or not enough salt. Ensure proper temperature control and accurate salt measurements.
- No Activity/Bubbles: The temperature might be too cold, or there might not be enough active bacteria. Move to a warmer spot. Ensure your salt is non-iodized.
Storing Your Fermented Masterpieces
Once your fermented vegetables reach your desired taste and texture, transfer them to the refrigerator. The cold temperature significantly slows down the fermentation process, preserving their flavor and crispness. They can last for several months in the fridge!
Beyond the Basics: Expanding Your Fermentation Skills
Once you’ve mastered the basics, the world of fermented vegetables is vast and exciting!
- Kimchi: A spicy Korean staple often made with napa cabbage and various seasonings.
- Dilly Beans/Carrots: Classic lacto-fermented green beans or carrot sticks with dill.
- Fermented Hot Sauce: Fermenting peppers before blending creates a complex, tangy hot sauce.
- Beet Kvass: A fermented beet tonic, excellent for gut health.
You can also explore using your active sourdough starter discard to kickstart certain vegetable ferments, adding another layer of complexity and flavor, as discussed in our Creative Ways to Use Sourdough Discard blog post!
Mastering fermented vegetables is a journey of discovery, bringing vibrant flavors and profound health benefits to your kitchen. Embrace the bubbling magic, experiment with different vegetables and seasonings, and enjoy the delicious rewards of a thriving gut!
Frequently Asked Questions about Fermented Vegetables (FAQ)
Is the “hooch” (liquid) on top of my ferment normal?
If it’s a clear or slightly cloudy liquid, yes, it’s perfectly normal and often desirable. It’s just brine that has risen. If it’s a dark, thick, or strangely colored liquid, or smells foul, it might be a sign of spoilage, and you should discard it.
How much salt should I use?
A general guideline is 2% salt by weight of the vegetables (for dry salting) or 2% salt by weight of the water (for brine). This creates an optimal environment for beneficial bacteria and inhibits harmful ones. Using a kitchen scale for accuracy is highly recommended.
Can I ferment frozen vegetables?
It’s best to use fresh, organic, high-quality vegetables for fermentation. Frozen vegetables tend to lose their crispness and can become mushy during the fermentation process due to cell wall damage from freezing.
How long does fermentation take?
The time varies depending on the vegetable, salt concentration, and temperature. Generally, it can take anywhere from 5 days to 3 weeks. Start tasting after a week, and once it reaches your preferred tanginess and texture, move it to the fridge to slow down the process.
My ferment smells bad or looks weird. Is it safe?
A good ferment should smell pleasantly sour, tangy, or lactic (like yogurt). If it smells putrid, rotten, like dirty socks, or has visible fuzzy mold (green, black, pink), it’s likely spoiled. When in doubt, throw it out. Trust your nose and eyes.

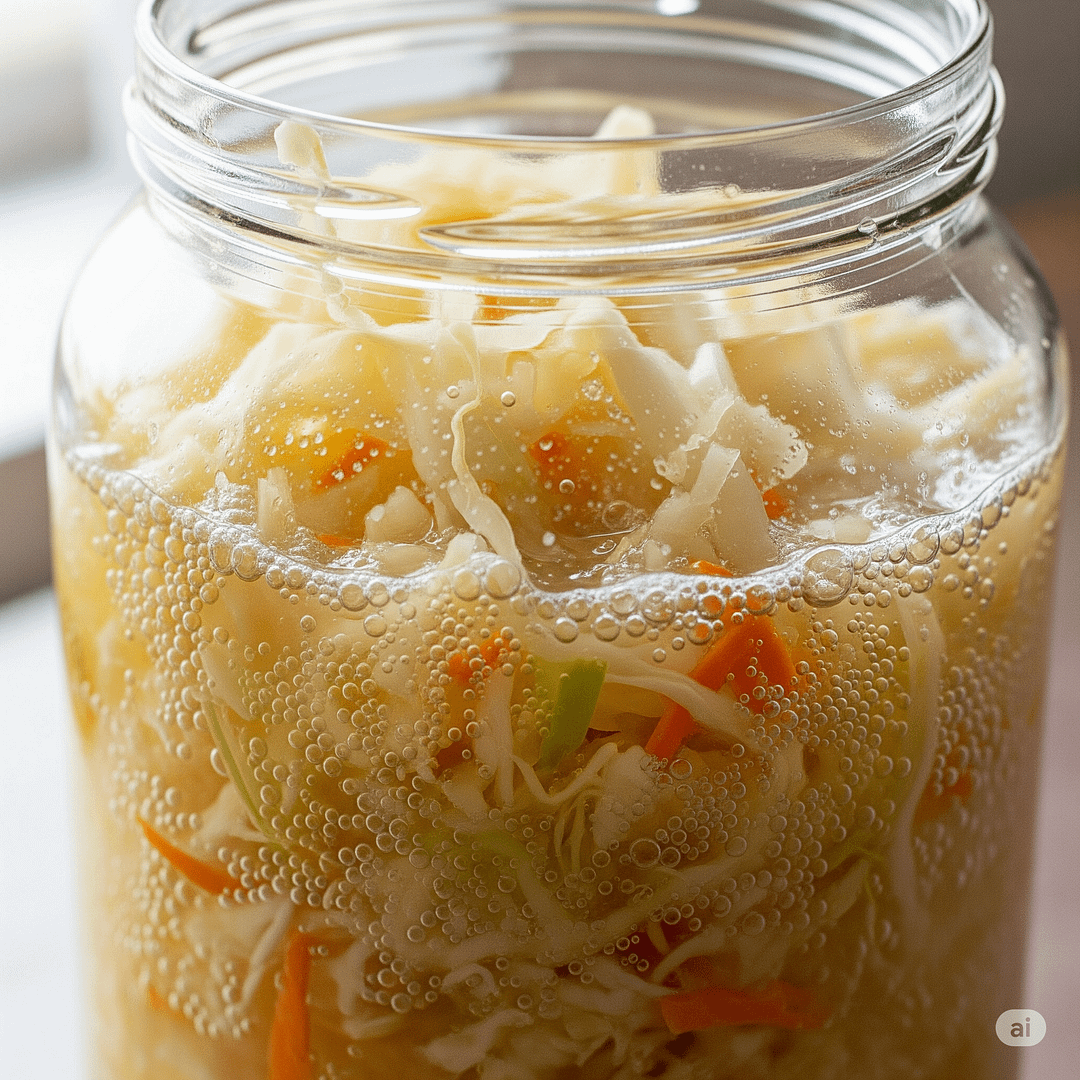

 and brine method for carrots (right).")