The aroma of freshly baked sourdough bread is undeniably comforting, a testament to culinary patience and natural fermentation.
But before you can bake that beautiful loaf, you need a living, breathing sourdough starter – a magical concoction of flour, water, and wild yeast.
Creating a sourdough starter might seem daunting, but it’s a surprisingly simple and rewarding process. Think of it as cultivating a tiny, vibrant pet that will bring incredible flavor and texture to your baking.
This guide will walk you through every step, from its humble beginnings to a thriving, bubbly starter ready to transform your kitchen into an artisanal bakery.
What Exactly Is a Sourdough Starter?
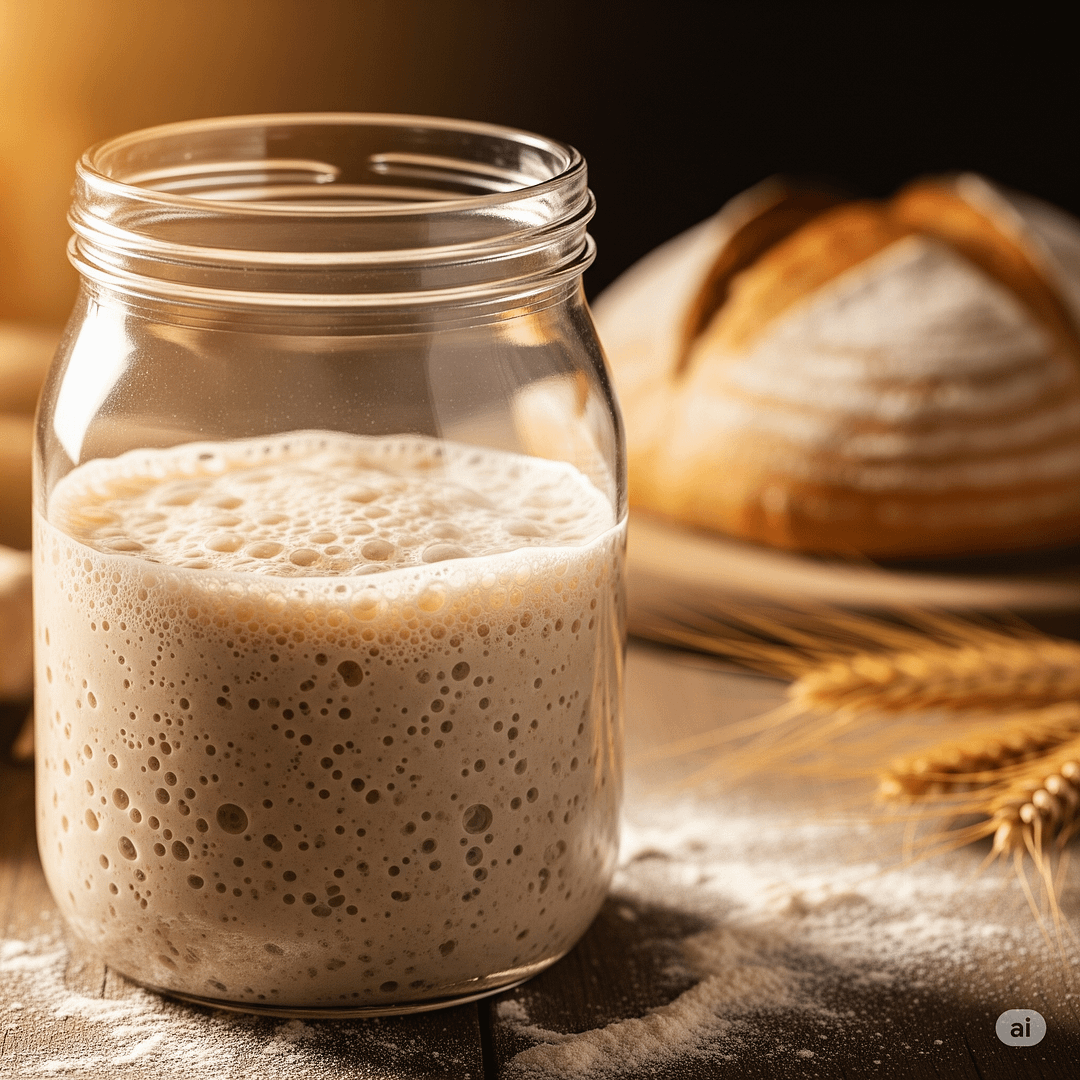
At its core, a sourdough starter is a fermented mixture of flour and water. It’s a living culture of wild yeasts and beneficial bacteria (primarily Lactobacillus species) naturally present in flour, the air, and even on your hands.
These microorganisms work together to break down the starches in the flour, producing carbon dioxide (which makes your bread rise) and lactic and acetic acids (which give sourdough its distinctive tangy flavor).
Unlike commercial yeast, which provides a fast, singular rise, a sourdough starter offers a slower, more complex fermentation process, resulting in bread with superior flavor, texture, and often, better digestibility.
What You’ll Need to Begin Your Sourdough Journey
Before you dive in, gather these simple supplies. You likely have most of them already!
- Glass Jar or Container (1-liter capacity or more): A wide-mouthed glass jar is ideal. Glass allows you to see the activity, and a wide mouth makes feeding easier. Avoid metal containers for long-term storage, as the acidity can react with some metals.
- Whole Wheat Flour: This is crucial for the first few days. Whole wheat flour contains more nutrients and a higher concentration of wild yeasts, giving your starter a strong kickstart.
- Unbleached All-Purpose Flour or Bread Flour: Once your starter is established, you can switch to unbleached all-purpose or bread flour for daily feedings. Unbleached is important as bleach can inhibit microbial growth.
- Filtered Water (Room Temperature): Chlorinated tap water can inhibit yeast activity. If you don’t have filtered water, you can boil tap water and let it cool completely, or simply let tap water sit out uncovered for 24 hours to allow chlorine to evaporate.
- Digital Kitchen Scale: This is highly recommended for accuracy. Sourdough baking relies on precise ratios.
- Rubber Spatula or Spoon: For mixing.
- Breathable Cover: A lid, plastic wrap (loosely applied), or a clean cloth secured with a rubber band. The starter needs air but also protection from contaminants.

Your Day-by-Day Guide to Creating a Sourdough Starter
Patience is key! It typically takes 5-7 days, sometimes longer, for a starter to become consistently active.
Day 1: The Inauguration
- Ingredients: 50g whole wheat flour, 50g filtered water
- Instructions: In your clean glass jar, combine the 50g whole wheat flour and 50g filtered water. Mix thoroughly with a rubber spatula or spoon until no dry clumps remain. Scrape down the sides of the jar.
- Cover: Loosely cover the jar with a lid, plastic wrap, or a cloth.
- Rest: Place the jar in a warm spot (ideally 70-78°F / 21-26°C). A draft-free cupboard or near a window (but not in direct sunlight) works well.
- Observation: You likely won’t see much activity today.
Day 2: First Signs of Life?
- Observation: Check for any tiny bubbles on the surface or along the sides of the jar. You might notice a faint, slightly sour or yeasty smell. Don’t worry if you don’t see anything; it’s still early.
- Do Not Feed: Resist the urge to feed it today. Let the microbes establish themselves.
- Rest: Return the jar to its warm spot.
Day 3: The First Feeding
- Observation: You should definitely see some small bubbles now, and perhaps a slightly tangy aroma.
- Discard: Gently stir the starter. Discard all but 50g of the starter. This step is crucial to manage the volume and concentrate the yeast and bacteria. (Don’t worry, you can find uses for sourdough discard in our blog post, [10 Creative Ways to Use Sourdough Discard](link-to-discard-blog-post-here if available)).
- Feed: Add 50g whole wheat flour and 50g filtered water to the remaining 50g starter. Mix well until smooth.
- Rest: Cover loosely and return to its warm spot.
Day 4-7 (and beyond): Establishing the Rhythm
From Day 4 onwards, you’ll establish a regular feeding routine, usually every 12-24 hours depending on temperature and activity.
- Before Feeding: Observe your starter.
- Bubbles: Are there visible bubbles on the surface and along the sides?
- Rise and Fall: Has it risen since its last feeding and perhaps fallen back down?
- Smell: Does it smell pleasantly yeasty, tangy, like ripe fruit, or even slightly like vinegar? (A strong, pungent smell like acetone or nail polish remover often means it’s hungry and needs more frequent feeding.)
- Texture: Is it bubbly and somewhat elastic?
- The Feeding Cycle:
- Discard: Discard all but 50g of your starter.
- Feed: Add 50g unbleached all-purpose or bread flour and 50g filtered water. (You can continue with whole wheat if you prefer a more robust starter, but many switch to white flour for a milder flavor and easier maintenance.)
- Mix: Mix thoroughly.
- Cover & Rest: Cover loosely and return to its warm spot.
How Do You Know Your Starter is Ready?
Your sourdough starter is ready to bake with when it consistently shows these signs:
- Consistent Activity: It reliably doubles (or more!) in volume within 4-8 hours after feeding.
- Bubbly Texture: It’s full of bubbles throughout, not just on the surface.
- Pleasant Aroma: It smells tangy, yeasty, and slightly fruity – never overwhelmingly sour or like acetone.
- The Float Test: Take a small spoonful of starter and gently drop it into a glass of room temperature water. If it floats, it’s ready! If it sinks, it needs more time to develop strength.
Maintaining Your Sourdough Starter
Once active, maintaining your starter is straightforward:
- Room Temperature (Daily Baking): If you’re baking every day or every other day, keep your starter on the counter and feed it every 12-24 hours.
- Refrigeration (Infrequent Baking): If you bake less often (e.g., once a week or every few weeks), store your starter in the refrigerator. Feed it once a week: take it out, let it warm up for an hour, discard all but 50g, feed with 50g flour and 50g water, let it sit at room temperature for 2-4 hours to show some activity, then return it to the fridge.
- Reviving from the Fridge: When you’re ready to bake, take your starter out of the fridge, feed it, and let it become active on the counter for 1-2 feedings (12-24 hours total) before using it.
Common Sourdough Starter Questions (FAQ)
Q: What if my starter looks like nothing is happening? A: Don’t panic! This is very common, especially in cooler environments. Ensure it’s in a warm spot. Give it a bit more time. Sometimes, skipping a feed on Day 2 can give the microbes a chance to really establish themselves before the first discard and feed. Also, ensure you are using filtered water.
Q: Why is there a dark liquid on top of my starter (hooch)? A: This dark liquid, called “hooch,” is a sign that your starter is hungry! It means the yeast and bacteria have consumed most of the available food (flour). You can pour it off or stir it in before feeding. If it’s pink or orange, discard the starter and start over.
Q: Can I use different flours? A: Absolutely! While whole wheat is great for starting, you can feed your established starter with rye flour for a very active starter, or a mix of different flours. Just ensure they are unbleached.
Q: My starter smells like nail polish remover / acetone. Is it ruined? A: This strong smell usually means your starter is very hungry and producing more acetic acid. It’s often a sign of a very active starter that needs more frequent feeding. Give it a good feed (or even two in one day if it’s really potent) and it should recover. Only discard if you see mold.
Q: How do I know if my starter has mold? A: Mold will typically appear as fuzzy, green, black, or pink spots. If you see any mold, unfortunately, you should discard the entire starter and start fresh. It’s rare if you keep your jar clean and covered.
Your Sourdough Journey Begins!
Creating a sourdough starter is a rewarding introduction to the world of natural leavening. It requires a little patience and consistency, but the result – a thriving culture that breathes life into your bread – is truly magical.
Embrace the process, observe your starter, and soon you’ll be baking delicious, homemade sourdough loaves that will amaze your friends and family.
Happy baking!