Blog Details

Why Does Your Cake Stick to the Pan? Learn foolproof fixes
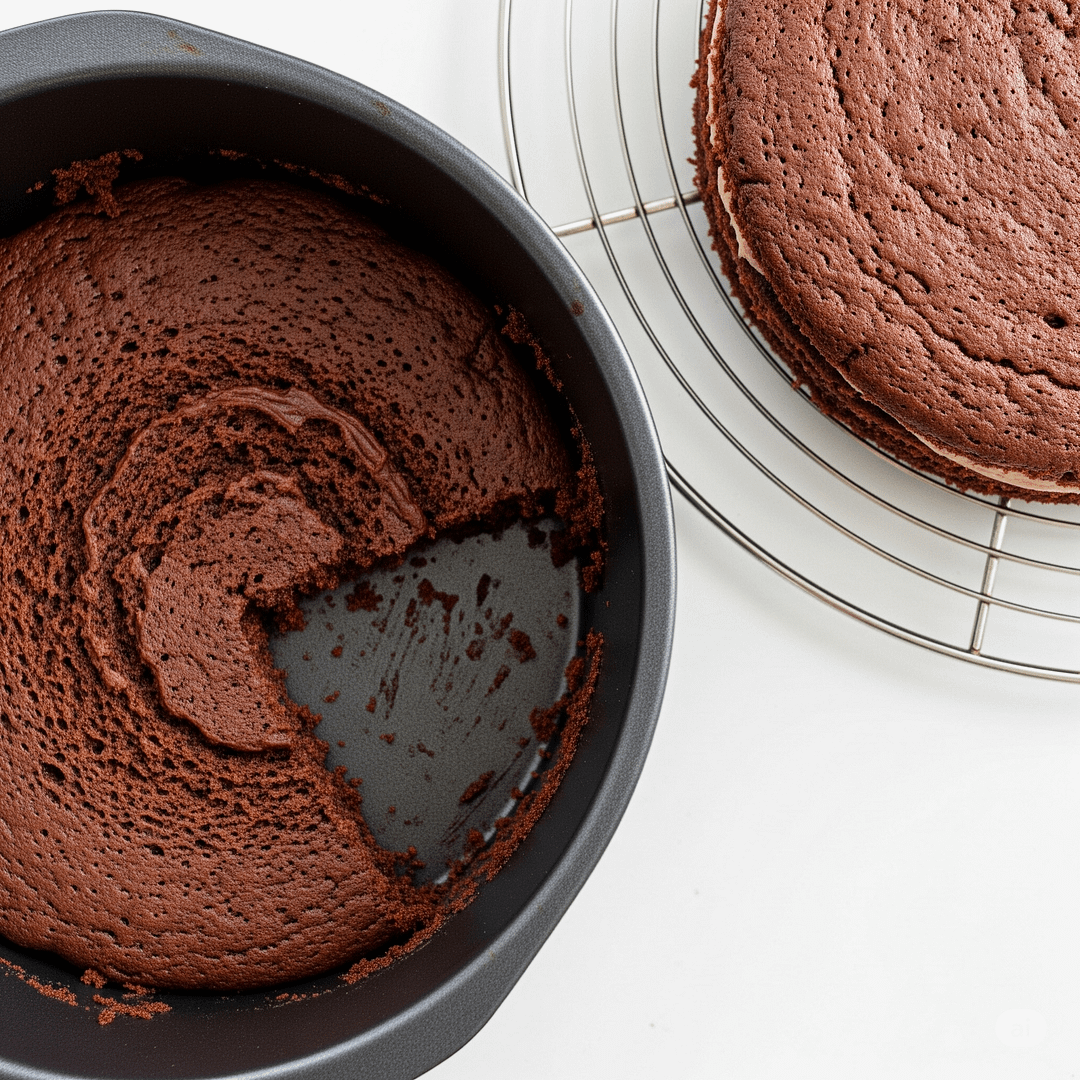
It’s a moment all home bakers dread: the anticipation of a beautiful, golden cake, only to have it stubbornly cling to the pan, leaving behind a frustrating, mangled mess. If you’ve ever found yourself asking, “Why does your cake stick to the pan?” you’re certainly not alone. It’s a common baking woe, but the good news is, it’s almost always preventable!
Understanding the root causes of cake sticking is the first step to achieving effortless release. Let’s delve into the culprits behind this common baking problem and, more importantly, equip you with the reliable fixes to ensure your cakes always slide out beautifully.
The Sticky Culprits: Common Reasons Your Cake Clings
Cakes stick for a variety of reasons, often a combination of factors related to preparation, baking, and cooling:
- Inadequate Pan Preparation: This is, hands down, the primary reason. If the pan isn’t properly greased and floured (or lined), there’s no barrier between the batter and the metal, allowing it to fuse during baking.
- Pan Material & Condition: Old, scratched non-stick pans can lose their non-stick properties. Darker pans absorb more heat, which can sometimes lead to more sticking if not properly prepared.
- Over-baking: A cake that’s been baked for too long can dry out excessively, causing it to shrink less from the pan sides and become more brittle, making it prone to breaking and sticking.
- Cooling Missteps: Removing the cake too early (when it’s too fragile) or leaving it in the pan for too long (allowing it to cool and “cement” itself) can both cause sticking.
- High Sugar Content: Cakes with a lot of sugar can become caramel-like and adhere more readily to surfaces if not properly protected.
- Intricate Pan Designs: Shaped pans, especially Bundt pans with their many crevices, offer more surface area for the cake to cling to, requiring extra diligence.
The Fixes Revealed: Foolproof Cake Release Techniques
Conquering sticky cakes comes down to mastering a few key preparation and timing techniques:
- Master the Greasing & Flour-Dusting Technique:
- The Foundation: Use a solid, unsalted fat like butter or shortening. Apply a generous, even layer over every interior surface of the pan – the bottom, sides, and into all crevices (especially crucial for Bundt pans). A pastry brush or even your clean fingers can help here.
- The Second Barrier (Flour or Cocoa): After greasing, add about 1-2 tablespoons of all-purpose flour (for vanilla/light cakes) or cocoa powder (for chocolate cakes to avoid white residue). Rotate and tap the pan vigorously over a sink to ensure the flour coats every greased surface. Discard any excess. This creates a dry, slippery barrier.
- Pro Tip for Intricate Pans: For highly detailed Bundt pans, consider making a specialized “cake release” paste. This paste is often a mixture of equal parts (by volume) of softened butter or shortening, vegetable oil, and all-purpose flour. Whisk it until smooth and brush it generously into every nook and cranny. This homemade solution provides superior non-stick power! Our Kitchen Measurement Converter can be super handy for accurately measuring out the components for this paste to get the perfect consistency.
- Embrace Parchment Paper:
- For round or square cake pans, lining the bottom with parchment paper is a game-changer and practically guarantees a clean bottom release.
- Method: Grease the pan first, then press a cut circle or square of parchment paper onto the bottom. Grease the parchment paper itself, and then proceed with flouring the entire pan (including over the parchment). The cake will bake directly on the non-stick paper.
- Respect Baking Time and Doneness:
- Avoid Over-baking: As a cake bakes, it sets and often pulls away slightly from the sides of the pan. Over-baking can dry it out, making it stick more, and also make it more fragile and prone to breaking upon release.
- Know When It’s Done: Use the toothpick test (inserted into the center, should come out with moist crumbs, not wet batter) or gently touch the center – it should spring back. Avoid baking until completely clean, as this often means it’s overbaked.
- The Cooling Process is Crucial (Timing is Everything!):
- Initial Pan Cooling (10-15 minutes): Once out of the oven, place the cake pan on a wire cooling rack. Allow the cake to cool in the pan for 10 to 15 minutes. This critical window allows the cake to firm up slightly and gently contract from the pan sides. Any less and it might fall apart; any more and it might “cement” itself back to the pan.
- Invert & Cool Completely: After the initial cooling time, place your wire cooling rack directly over the cake pan. Holding both firmly, quickly and confidently invert the cake onto the rack. Gently lift the pan away. If it’s a Bundt pan, a gentle wiggle or a light tap on the counter might help release any last clingers.
- Full Cooling on Rack: Allow the cake to cool completely on the wire rack before attempting to frost, slice, or move it to a serving platter. Cooling on a rack ensures air circulation, preventing condensation that can make the bottom soggy and cause it to stick after release.
By diligently following these steps, you’ll transform your baking experience from sticky struggles to triumphant, clean releases. Say goodbye to frustration and hello to perfectly presented cakes!
Frequently Asked Questions (FAQ)
Q1: What’s the best homemade cake release substitute for store-bought spray?
A popular and effective homemade cake release paste is a mixture of equal parts (by volume) of softened vegetable shortening, vegetable oil, and all-purpose flour. Whisk it until smooth and thick, then brush it into your prepared pan. It’s excellent for intricate pans like Bundts.
Should I grease and flour a non-stick cake pan?
Yes, it’s generally recommended, especially for important cakes or more delicate batters. While non-stick pans are designed to release easily, their coating can degrade over time, and a little extra preparation ensures a foolproof release.
My cake releases from the sides but sticks to the bottom. What’s wrong?
This usually indicates that your bottom preparation was insufficient, or the parchment paper (if used) wasn’t properly greased/floured. Ensure you’re evenly coating the very bottom surface and that your parchment circle is also prepared. Over-baking can also make the bottom more prone to sticking.
Can using too much grease make a cake stick?
While less common than too little, excessive grease can sometimes pool at the bottom, making the bottom crust greasy and potentially causing the cake to slide around too much or develop an undesirable texture, which could indirectly lead to issues if the cake then breaks. The key is an even, adequate layer, not an overly thick one.
How can I save a cake that’s already stuck badly in the pan?
If a cake is severely stuck, trying to force it out will likely cause more damage. Instead, consider repurposing it. You can break it apart to make trifles, cake pops, or crumble toppings for other desserts. For smaller stuck bits, an offset spatula can sometimes carefully free them to patch onto the main cake with frosting.
Related Blog Posts You Might Enjoy:
Our Products
-
Silicone Donut Mold – Makes 6 Non-Stick Donuts
$9.47 Select options This product has multiple variants. The options may be chosen on the product page -
Stainless Steel Onion Needle – Slice Holder
$9.55 Select options This product has multiple variants. The options may be chosen on the product page -
Creative Ceramic Cup with Star & Moon Saucer
$29.66 – $69.66Price range: $29.66 through $69.66 Select options This product has multiple variants. The options may be chosen on the product page -
Mini Pancake Machine – Non-Stick Electric Pan
$39.48 Select options This product has multiple variants. The options may be chosen on the product page -
Kitchen Supplies Cheese And Butter Slicer
$29.91 Select options This product has multiple variants. The options may be chosen on the product page -
Kitchen Gadget with Integrated Fruit Cutter
$14.67 Select options This product has multiple variants. The options may be chosen on the product page
Products
-
Silicone Donut Mold – Makes 6 Non-Stick Donuts
$9.47 Select options This product has multiple variants. The options may be chosen on the product page -
Stainless Steel Onion Needle – Slice Holder
$9.55 Select options This product has multiple variants. The options may be chosen on the product page -
Creative Ceramic Cup with Star & Moon Saucer
$29.66 – $69.66Price range: $29.66 through $69.66 Select options This product has multiple variants. The options may be chosen on the product page -
Mini Pancake Machine – Non-Stick Electric Pan
$39.48 Select options This product has multiple variants. The options may be chosen on the product page
Blogs


