Blog Details

Why Your Food Burns (or Sticks!): Master Heat Control for Perfect Cooking
Have you ever excitedly started cooking dinner, only to find your masterpiece stuck stubbornly to the pan, or worse, burnt on the outside while still raw inside?
It’s a frustratingly common kitchen problem that can quickly turn a hopeful meal into a disheartening cleanup. The good news? The solution often lies not in your ingredients or even your technique, but in understanding and mastering heat control.
At Kitchen Whizdom, we believe that where kitchen wisdom thrives, cooking becomes a joy. And unlocking the power of proper heat management is one of the most fundamental wisdoms you can gain. Let’s dive into why your food burns or sticks, and how you can prevent it for good.
The Sticky Truth: Why Food Sticks to Your Pan
Before we get to burning, let’s tackle the stickiness. Food sticking to your pan is a primary cause of frustration, especially when you’re trying to achieve that beautiful sear.
There are a few key culprits:
- Not Enough Heat: Sounds counterintuitive, right? But if your pan isn’t hot enough, especially stainless steel, your food won’t immediately form a crust. Instead, it will linger on the surface, allowing proteins and sugars to bond with the metal.
- Too Much Oil (or Not Enough!): A thin, even layer of oil acts as a barrier. Too little, and you lose the barrier. Too much, and your food can “fry” rather than sear, or even boil in excess oil, leading to stickiness.
- Pan Material: Different pans react to heat differently. While non-stick pans are designed to prevent sticking, stainless steel and cast iron rely on proper preheating to create a natural non-stick surface.
- Crowding the Pan: Overloading your pan drops the temperature dramatically, leading to steaming instead of searing, and a higher chance of sticking.
Conquering the Scorch: Why Your Food Burns
Burning food is a different beast but often tied to heat control as well. This usually happens when:
- Heat is Too High: This is the most obvious reason. If the heat is blasting, the surface of your food will char long before the inside has a chance to cook.
- Uneven Heat Distribution: Some pans have hot spots, or your burner might not distribute heat evenly. This can lead to parts of your food burning while others cook perfectly.
- Lack of Moisture/Fat: Foods cooked in dry heat without enough oil or natural moisture are more prone to burning.
- Leaving Food Unattended: Even with perfect heat, a momentary lapse in attention can be all it takes for food to go from golden to burnt.
Master Heat Control: Your Path to Perfectly Cooked Food
Now for the solutions! Achieving that perfect golden crust without burning, or cooking through without sticking, comes down to these actionable steps:
1. The Power of Preheating: Get Your Pan Ready
This is perhaps the most crucial step, especially for stainless steel and cast iron.
- For Stainless Steel: Place your High-Quality Stainless Steel Pan (available at kitchenwhizdom.store) on the burner over medium-high heat. Wait a few minutes. To test if it’s ready, add a few drops of water. If the water forms beads that dance around and evaporate slowly, your pan is perfectly preheated. If it evaporates instantly, it’s too hot; if it just sits there, it’s not hot enough.
- For Cast Iron: Cast iron takes longer to heat up evenly. Place it over medium heat for 5-10 minutes. It should be hot enough that a drop of water sizzles instantly.
- For Non-Stick: Non-stick pans generally don’t need intense preheating and high heat can damage their coating. Medium heat for a minute or two is usually sufficient.
2. Choose the Right Fat, at the Right Time
Once your pan is hot, add your fat (oil or butter). Swirl it to coat the bottom evenly. Wait for it to shimmer (for oil) or melt and slightly foam (for butter) before adding your food. This indicates the fat is hot enough to create that non-stick barrier and start the searing process.
3. Don’t Crowd the Pan!
This is a common mistake. When you add too much food to a pan, it drastically lowers the pan’s temperature. This causes food to steam rather than sear, leading to a gray, flabby exterior instead of a beautiful crust, and increases the chance of sticking. Cook in batches if necessary. Give your food space to breathe!
4. Adjust Heat as You Cook: The Dynamic Approach
Cooking isn’t static. You’ll often need to adjust the heat as you go.
- Starting High for Sear: Begin with medium-high to high heat to get that initial sear or crust.
- Reducing for Cooking Through: Once a good sear is achieved, reduce the heat to medium or medium-low to allow the food to cook through without burning the exterior.
- Listen and Observe: Pay attention to the sounds and smells. A gentle sizzle is good; an aggressive crackle often means too much heat.
5. Check Internal Temperatures with Precision
For meats and larger items, visually judging doneness can be tricky, leading to overcooked, dry food or, worse, undercooked food. This is where an Instant-Read Thermometer (get yours at kitchenwhizdom.store) becomes your best friend.
Insert the probe into the thickest part of the food, avoiding bones. This gives you an accurate internal temperature, ensuring your food is perfectly cooked, safe to eat, and never burnt on the outside while raw inside. No more guessing, no more burning the exterior just to be sure it’s cooked through!
6. Know Your Burner Settings
Every stove is different. Get to know what “medium,” “medium-high,” and “low” truly mean on your specific stove. Spend some time observing how quickly water boils, or how butter melts, at different settings. This familiarity will significantly improve your heat control.
Don’t Forget to check out our newly launched tool : Recipe Cost Calculator
Ready to cook with confidence? Explore our range of premium cookware and indispensable kitchen tools designed to help your kitchen wisdom thrive.
Shop now at kitchenwhizdom.store and unlock your culinary potential!
Our Products
-
Unique Book Coffee Cup – Stack of Books Design
$19.12 – $19.28Price range: $19.12 through $19.28 Select options This product has multiple variants. The options may be chosen on the product page -
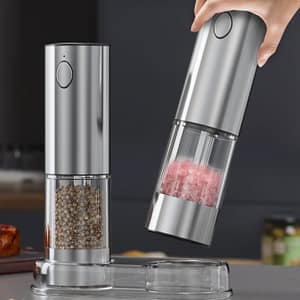
Salt & Pepper Electric Grinder – Rechargeable
$27.70 Select options This product has multiple variants. The options may be chosen on the product page -
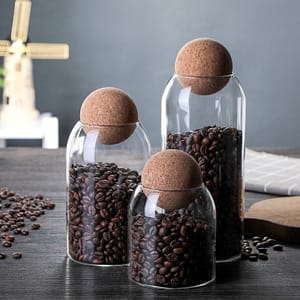
Glass Storage Jar – Cork Lid & Minimalist Design
$29.16 Select options This product has multiple variants. The options may be chosen on the product page -
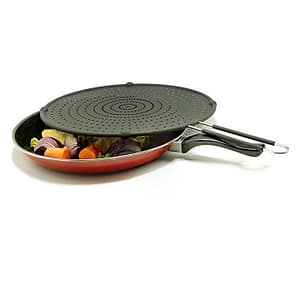
Food grade Silicone Splash Screen – Mess-Free Cooking
$24.55 Select options This product has multiple variants. The options may be chosen on the product page -
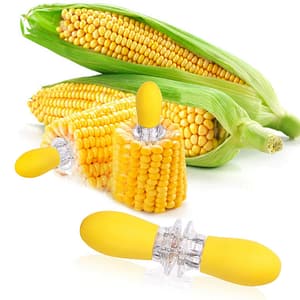
Stainless Steel Corn Cob Holders – Mess-Free
$12.35 Select options This product has multiple variants. The options may be chosen on the product page -
Silicone Donut Mold – Makes 6 Non-Stick Donuts
$9.47 Select options This product has multiple variants. The options may be chosen on the product page
Products
-
Unique Book Coffee Cup – Stack of Books Design
$19.12 – $19.28Price range: $19.12 through $19.28 Select options This product has multiple variants. The options may be chosen on the product page -
Salt & Pepper Electric Grinder – Rechargeable
$27.70 Select options This product has multiple variants. The options may be chosen on the product page -
Glass Storage Jar – Cork Lid & Minimalist Design
$29.16 Select options This product has multiple variants. The options may be chosen on the product page -
Food grade Silicone Splash Screen – Mess-Free Cooking
$24.55 Select options This product has multiple variants. The options may be chosen on the product page
